
If you’re looking for a simple and effective way to connect Google Analytics 4 to your Opencart online store using Google Tag Manager, you’ve come to the right place. In this article, we’ve prepared a step-by-step guide to demonstrate its simplicity. We will walk you through the entire configuration process. Let ‘s get started!
Why Connect Google Analytics 4 with Opencart?
Before delving into the technical details, it’s important to understand why connecting Google Analytics 4 (GA4) to Opencart is essential for your online business.
GA4 is the latest version of Google’s analytics tool, providing a wide range of valuable metrics and data to comprehend your visitors’ behavior and enhance your marketing strategy. Connecting GA4 with Opencart allows you to track store performance, measure campaign success, and make data-driven decisions
That’s why we have prepared a step-by-step guide to demonstrate how straightforward it is to link your store to GA4. Upon completing the guide, you’ll have a real business analytics example where various events, from adding items to the cart to completing a purchase, are tracked and displayed in the panel as a result of following the steps outlined below.
Step 1: Setting up a Google Analytics 4 Account
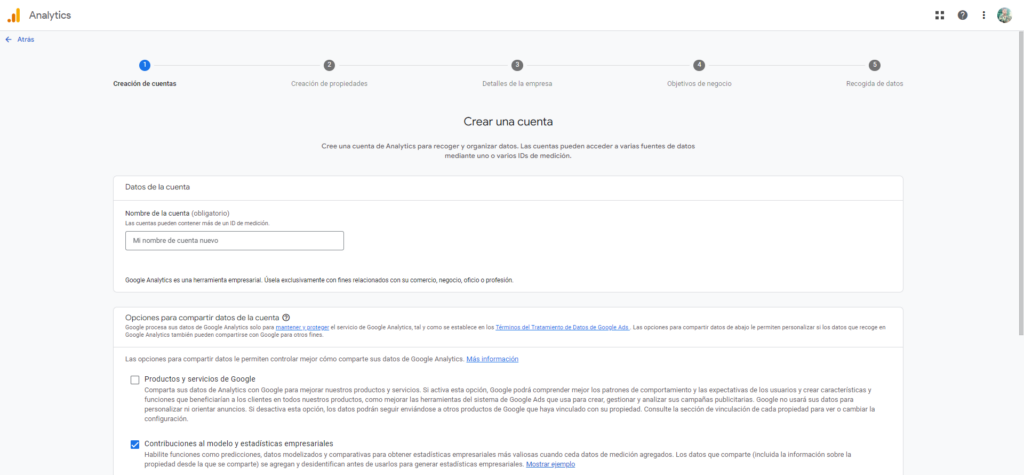
The first step is to set up a Google Analytics 4 account. If you already have a GA4 account, you can skip this step. If not, follow these steps:
- Access Google Analytics and create a new property for your Opencart’s store.
- Enter the necessary information, such as the property name and the URL of your Opencart store.
- Accept the terms of service and click on “Create.”
No matter what OpenCart version you’re using —yes, that includes OpenCart 3— Google Analytics is the way to go for tracking performance.
Step 2: Configuring Google Tag Manager for Opencart
Now that you have a GA4 account, it’s time to set up Google Tag Manager (GTM) for your Opencart store. This will allow you to track the actions performed by visitors on your ecommerce site in detail and connect various tracking tools without the need to add additional code to your website. Follow these steps to configure google tag manager for Opencart:
- Access Google Tag Manager and create a new account.
- Provide the required details, such as the account name and the URL of your Opencart store.
- Accept the terms of service and click on “Create.”
We create Opencart’s extensions that take your online store to the next level.
Stand out from the competition and provide an exceptional shopping experience
Contact us today to revolutionize your business.

Step 3: Implementing the Google Tag Manager Container in Opencart
Once you have configured GTM, it’s time to implement the container in your Opencart store. Let’s see how to do it.
Install Google Marketing Tools, the top Opencart extension for Tag Manager.
At this point, you may be wondering what Google Marketing Tools is, and the answer is simple—it’s the solution to your problem.
With our Opencart extension, you will achieve seamless synchronization between your store or multi-store and Google Tag Manager. This ensures that all the necessary tags are managed with just one tag (GTM), eliminating tag conflicts and the need to purchase/install a product for each tag you want to install in your store.
Furthermore, with Google Marketing Tools, you can generate XML/CSV feeds of your products for over 20 different external markets, expanding your reach and sales possibilities.
It is also compatible with CRON JOBS, allowing stores with a high volume of products and traffic to automatically generate their feeds based on the schedule configured on their server. This helps prevent performance issues and server limits.
Moreover, Google Marketing Tools is compatible with Google Consent, allowing you to maintain tracking even if users deny cookie acceptance.
Lastly, our extension complies with GDPR regulations and features a synchronization system with Mailchimp for effective abandoned cart campaigns.
Now, let’s show you how to install it.
- First, let’s purchase the extension. Visit the official GMT developer website and complete the purchase.
- Unzip the main file, ‘Google Marketing Tools V.X.X.X.zip,’ which contains individual zip files for each Opencart version range. Yes, as you can see, it is compatible not only with Opencart 4 but also with previous versions.
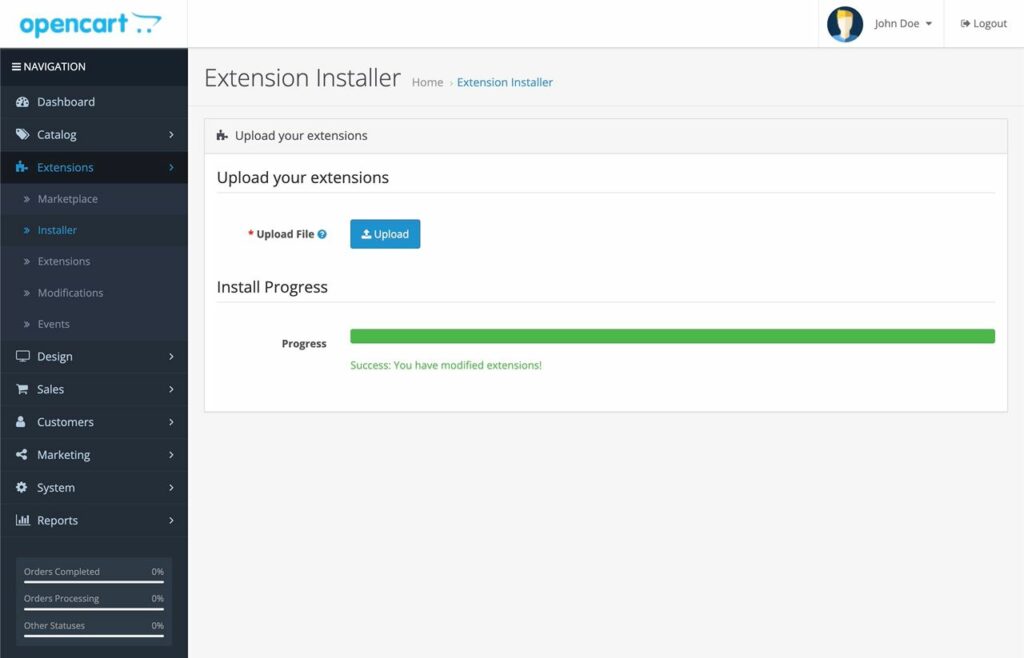
- Once logged into the Opencart administration, go to ‘Extensions > Installer’ and install the zip file that matches your Opencart version.
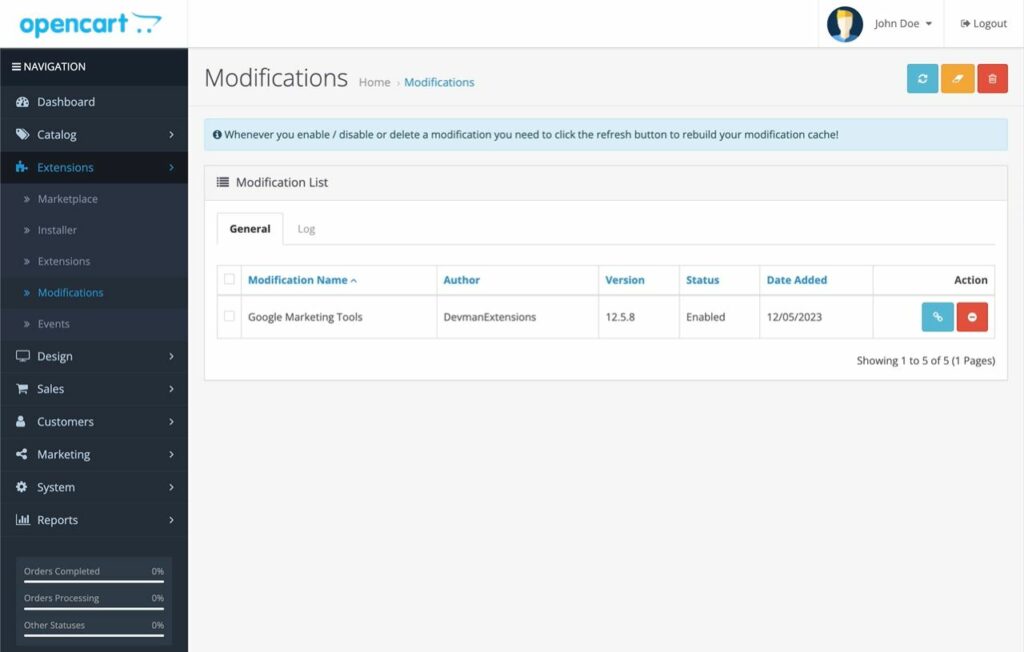
- We go to “Extensions > Modifications” to refresh OCMOD changes.
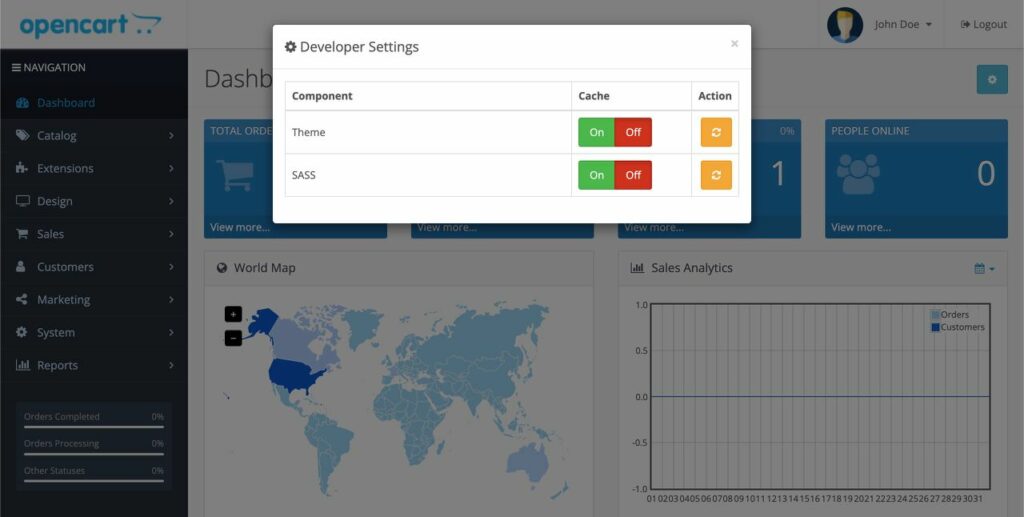
- Only for Opencart 3 users, if your store is not using this version, you can proceed to the next step. By default, this version comes with a cache system, and we recommend refreshing the cache from the administration dashboard by clicking on a blue button with a gear icon located in the upper right corner. It does not happen in any of the previous versions of OpenCart nor in Openart 4.0 or its updates nor in 3.0.3.9.
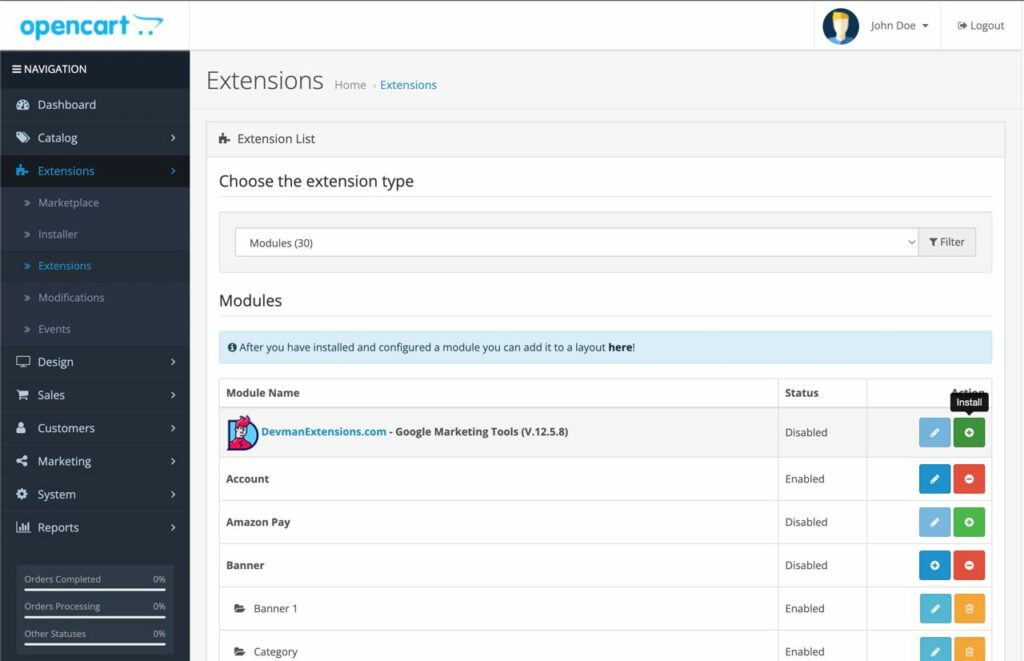
- As the final step, we go to “Extensions > Modules,” filter by “Modules,” and you will see “Google Marketing Tools” among the top positions. Press the green “Install” button.
There is an additional step for Opencart versions 1 and 2. We advise you to contact us, and we will gladly guide you through the missing step.
We create Opencart’s extensions that take your online store to the next level.
Stand out from the competition and provide an exceptional shopping experience
Contact us today to revolutionize your business.
Fantastic! Now that we have learned how to install Google Marketing Tools in Opencart, it’s time to take the next step and connect your store to Google Tag Manager.
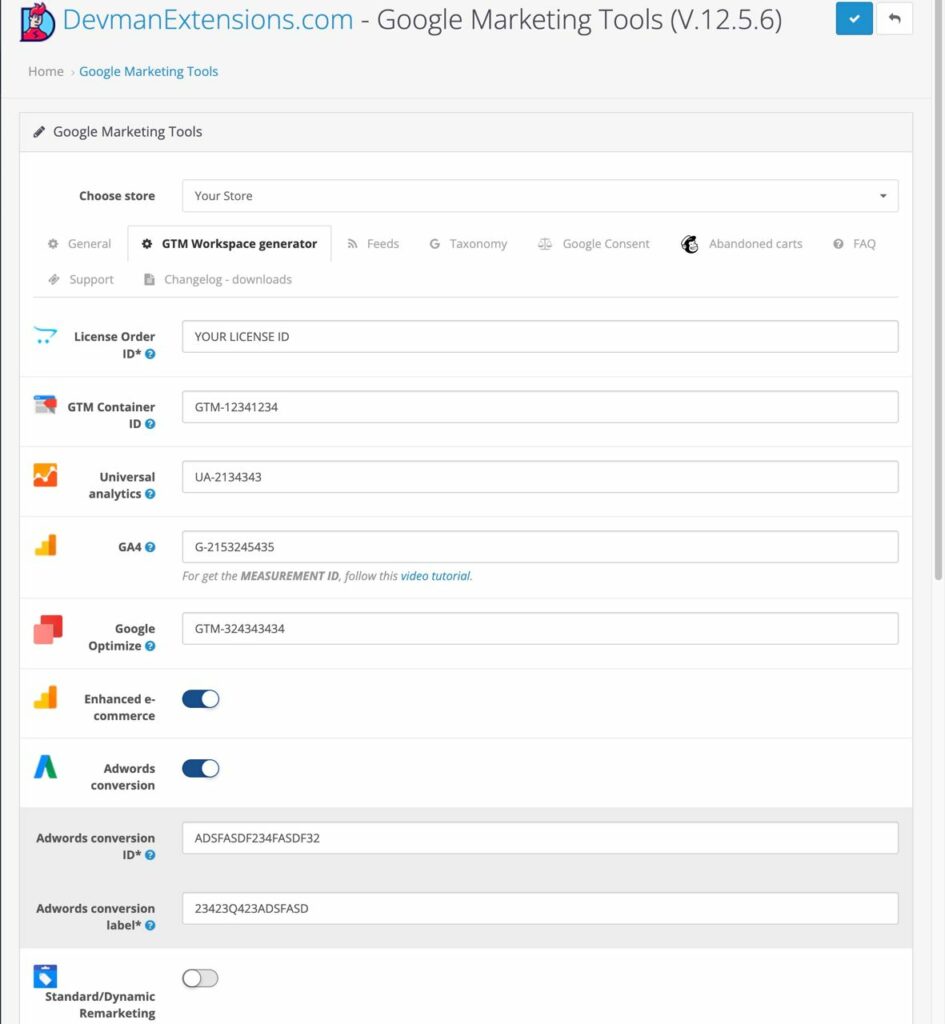
Generating a workspace for GTM
To do this, we will go to the “GTM Workspace Generator” tab, as shown in the image.
Importing the workspace into Google Tag Manager for OpenCart
Once you have generated and downloaded the workspace “.json” file from your email account, it’s time to import it into your Google Tag Manager account. Follow these steps:
- Download the workspace .json file to your computer.
- Log in to your Google Tag Manager account.
- Go to the “Admin” tab.
- In the list of links on the right, click on “Import Container.”
- Press the ‘Choose container file’ button and browse for the file.
- Select whether you want to import the workspace into an existing container or a new one.
- You have the option to completely replace the workspace (“Overwrite”) or merge all the data (“Merge”). We always recommend “Overwrite” if you haven’t installed your own tags.
- Click the blue “Confirm” button.
- The system will return you to the main page. Click the blue “Submit” button to publish your changes.
- Insert a name and description to identify this version of the workspace, and click the “Publish” button located in the upper right corner.
Now that we have generated and implemented the container in Google Tag Manager, we can take the next step. We are getting closer to our goal: linking your Opencart store to Google Analytics 4 through Google Tag Manager.
Step 4: Activation of Google Marketing Tools
Once we have generated, imported, and published the workspace in our Google Tag Manager account, we can enable Google Marketing Tools. When we enable Google Marketing Tools, the Google Tag Manager code will be inserted, which manages all the other tags contained in the workspace we imported in previous steps.
We need to extract the identifier (GTM-XXXXX) from our Google Tag Manager account. To do this, log in to our GTM panel, and we will find the identifier here:
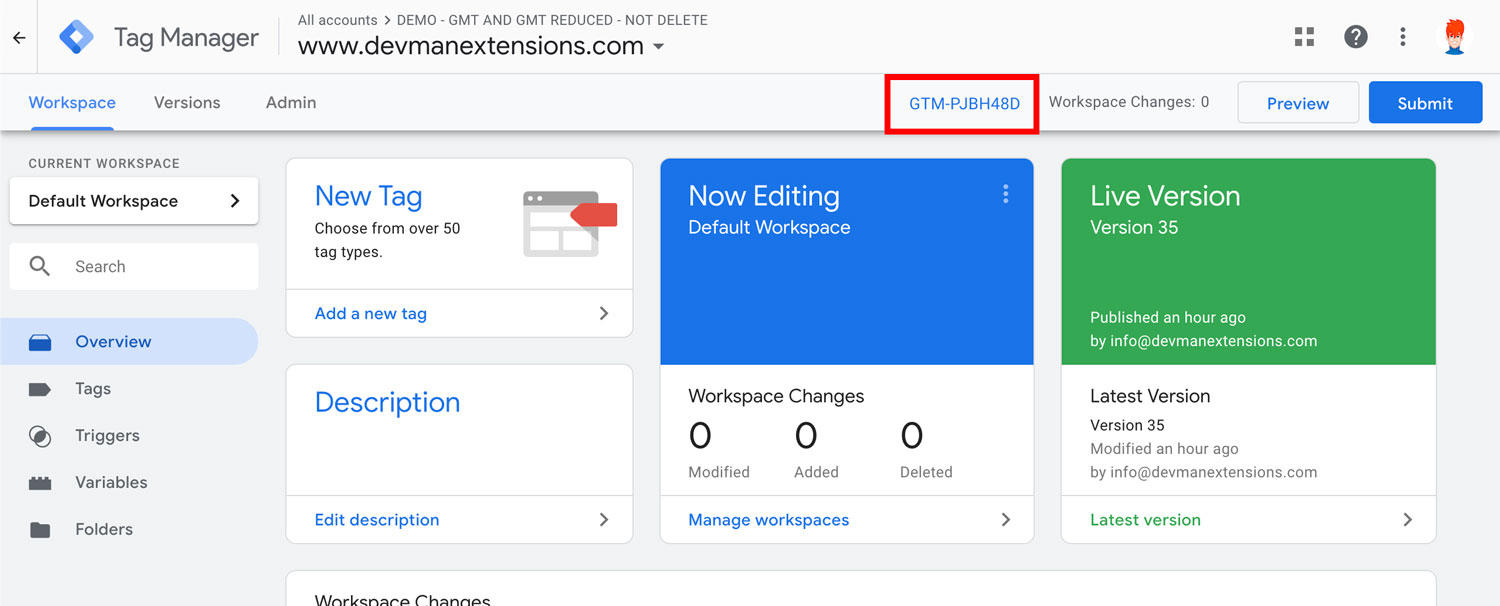
Copy our identifier and follow these steps to enable Google Marketing Tools:
- Go to the admin area of Google Marketing Tools.
- In the “General” tab, enable “Google Marketing Tools status.”
- Paste our ID (GTM-XXXXX) into “GTM Container ID.”
- Press the “Apply” button to save the changes.
Congratulations! You have successfully connected Google Analytics 4 with your Opencart store using Google Tag Manager. Remember that this integration will provide valuable insights into the performance of your website, user behavior, and e-commerce conversions. Make sure to regularly review GA4 reports and use that data to improve your marketing strategy and optimize your online store.
We create Opencart’s extensions that take your online store to the next level.
Stand out from the competition and provide an exceptional shopping experience
Contact us today to revolutionize your business.
Using Google Tag Manager to Opencart conection with GA4: final words
Remember that connecting Opencart with Google Analytics 4 through Google Tag Manager allows you to have comprehensive tracking of your store’s performance and make data-driven decisions. If you want to learn more about e-commerce tracking in Opencart or enhance your analytical skills, feel free to explore other resources and tutorials available on our blog.
Additionally, we wanted to show you an example of how your Google Analytics 4 could look after the tutorial. This is a real example of a fully functional business.