XML
The XML format is the one that offers more possibilities at the time of import our products, we will see all the possible examples so there is no doubt at the time of mapping our columns with this format.
NOTE: For the examples we are going to use captures of a real feed with YML, which is very popular among Ecommerces. Being one of the most complex structures, we could see an example of each column type.
XML Nodes
We need to have clear what is the "XML Node" and how to extract it of our file before throwing us to configure our "Column mapping".
XML Node: It is about the tags "tree" that there are up to the tag whose sub-tags we want to import.
Examples Of Nodes XML
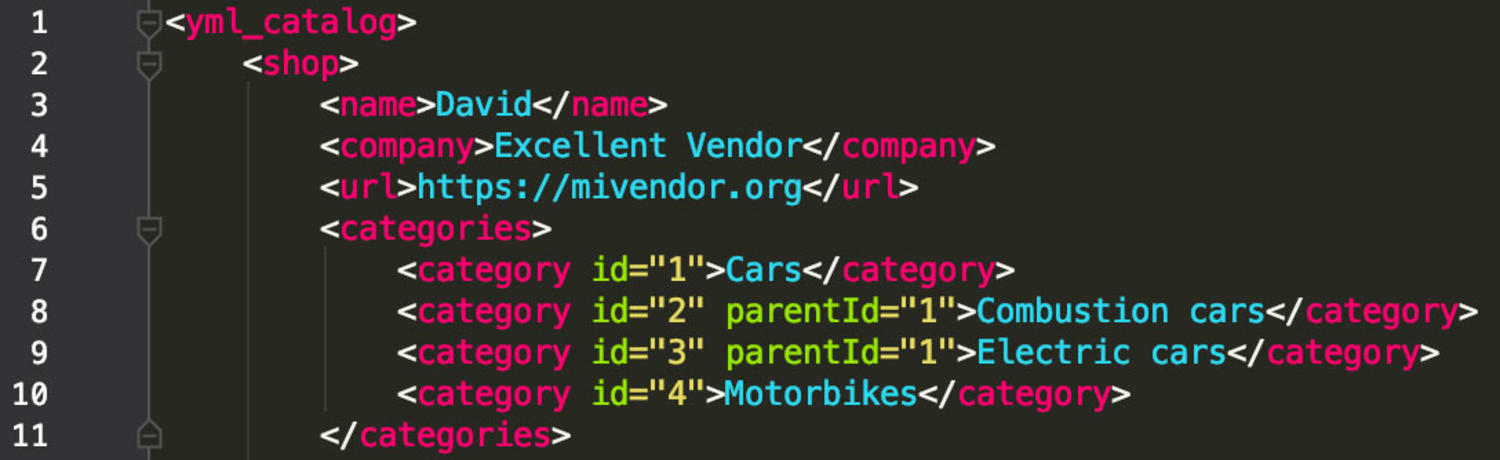
We see in this file that we can extract 2 nodes:
- yml_catalog>shop>categories>category : If we want to import the categories.
- yml_catalog>shop>offers>offer : If we want to import the products.
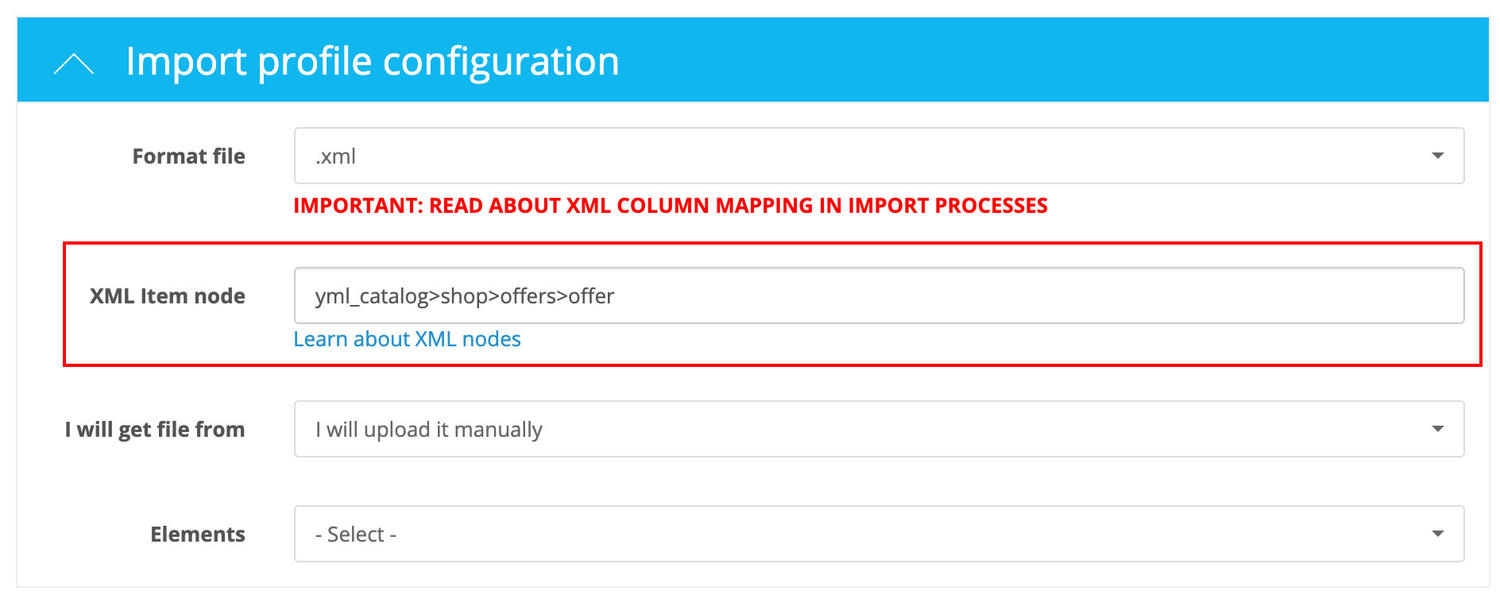
The XML Node must be assigned in the "XML Node" field that will appear automatically when we tell it that our profile uses the ".xml" file type, example:
Column mapping - Examples
We are going to use the same file that we saw in the nodes example, we are going to see an example of columns mapping for the products and categories that that file contains.
Columns Mapping fo the categories
Step 1 - Obtain the XML Node
As we saw in the "Nodes XML" tutorial, the node to process the categories will be yml_catalog>shop>categories>category.
Once established the node, we can access to the tags below:
- category: We will access to each "category " tag value (Cars, Combustion cars...)
- category@id: We will access the attribute of each "category" tag called "id" (1,2,3..)
- category@parentId: in the same way, we will access to the attribute values called "parentId" (1)
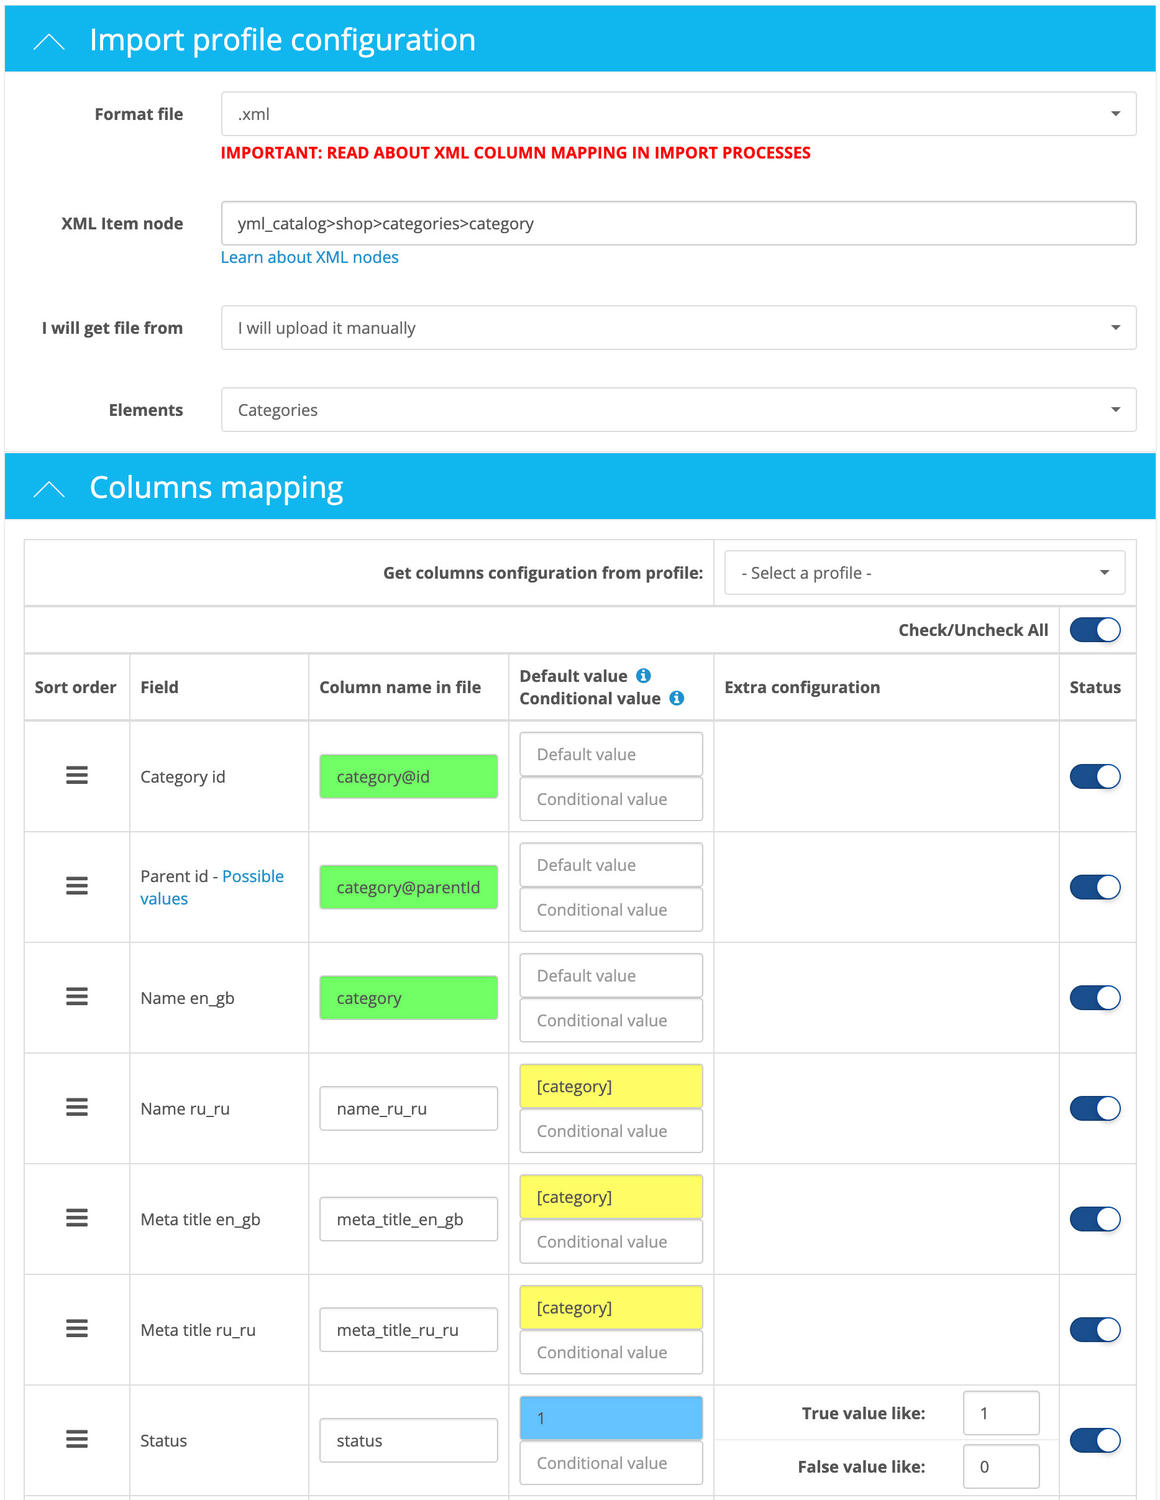
Step 2 - Configure the column mapping
We have colored the text fields to be able to explain it better:
- Green text boxes: Are the column names that we can find in our XML file.
- Yellow text boxes: We want that the "Name" and "Meta title" columns to have the same value that the name of the category ("category" column), for that we have to put in "Default value" the column name in square brackets (two of each appear because we are configuring this example in an Opencart that has two languages installed "en_gb" and "ru_ru"). We leave the columns names just as they are (name_ru_ru, meta_title_en_gb, meta_title_ru_ru) since it will not exist, it will get what "category" column is worth, which does exist.
- Blue text boxes: We have put here the default value "1" for the "Status" column (which doesn't exist in the file), in this way it will take the default value "1" for all the categories, if we hadn't done this, the categories would have been imported as disabled.
Columns Mapping for the products
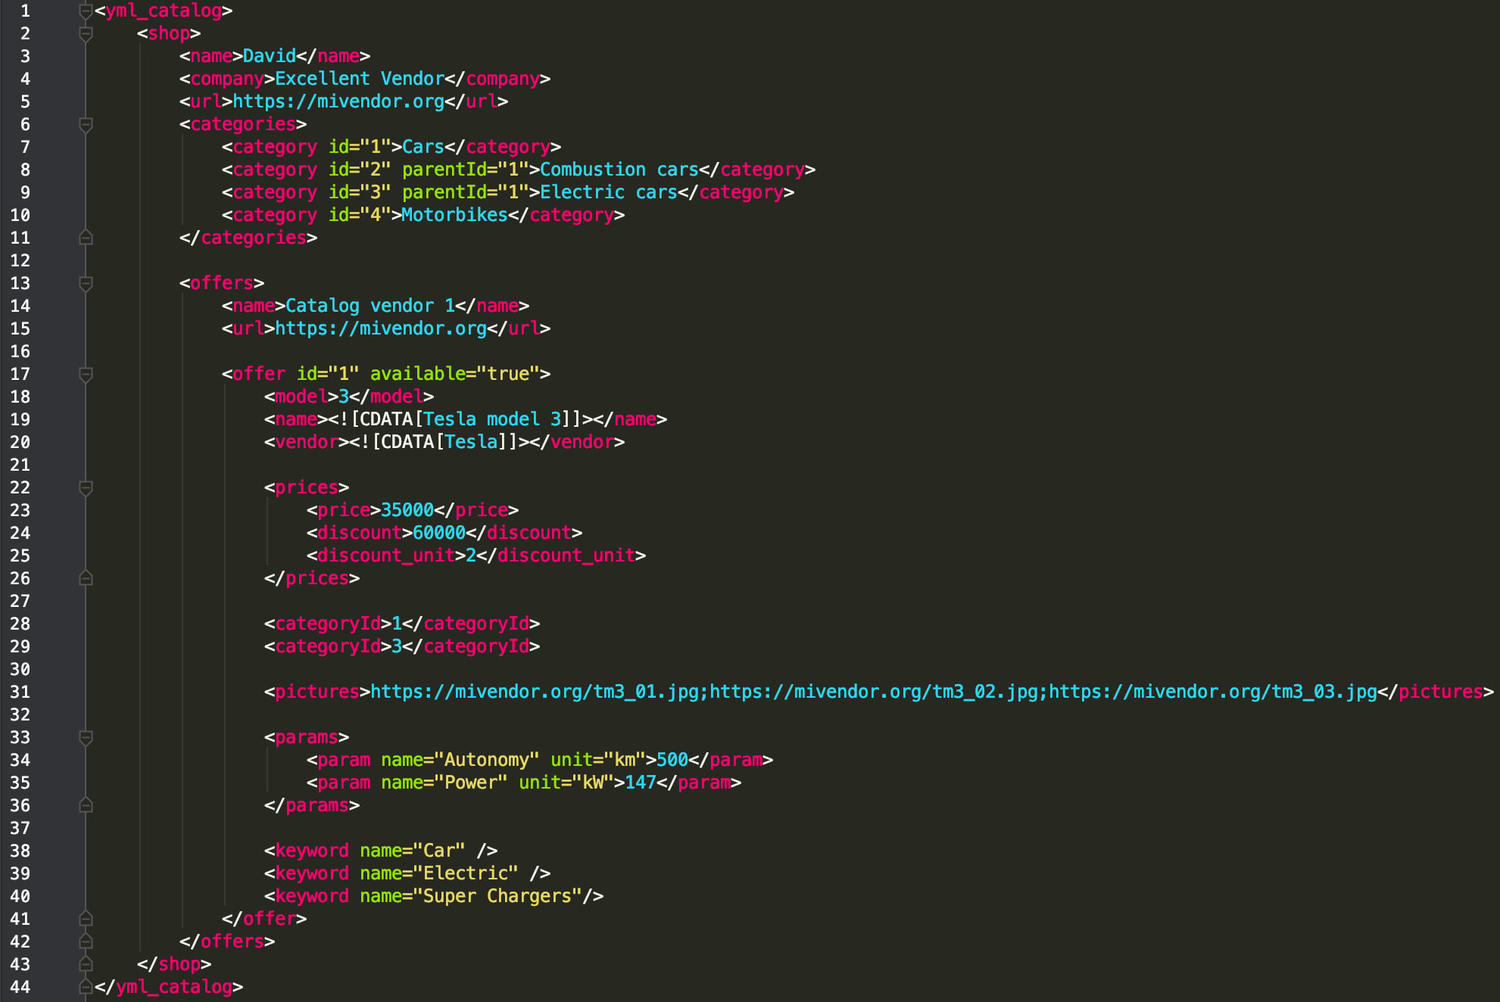
Step 1 - Obtain the XML Node.
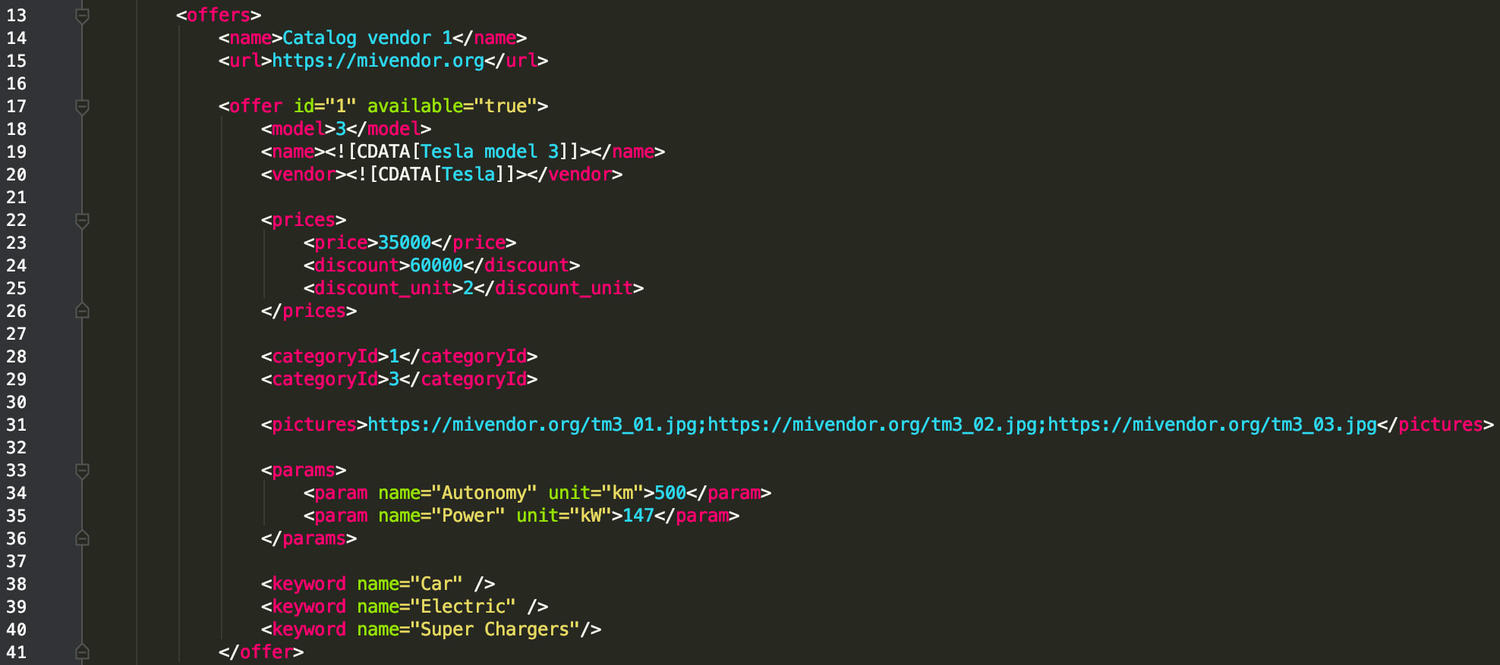
As we saw in the "Nodes XML" tutorial, to process the products will be yml_catalog>shop>offers>offer.
Once the node is established, we can access to the tags below:
- @id: We will access to the "id" attribute of each "offer" tag. (In our example: "1")
- @available: We will access to the "available" attribute of each "offer" tag. (In our example: "true")
- model: 3
- name: Tesla model 3
- vendor: Tesla
- prices>price: 35000
- prices>discount: 60000
- prices>discount_unit: 2
- categoryId>0: 1
- categoryId>1: 3
- pictures>0: https://mivendor.org/tm3_01.jpg (NOTE: Aditional configuration is required, we explain it later)
- pictures>1: https://mivendor.org/tm3_02.jpg (NOTE: Aditional configuration is required, we explain it later)
- pictures>2: https://mivendor.org/tm3_03.jpg (NOTE: Aditional configuration is required, we explain it later)
- params>param>0@name: Autonomy
- params>param>0@unit: km
- params>param>0: 500
- params>param>1@name: Power
- params>param>1@unit: kW
- params>param>1: 147
- keyword>0@name: Car
- keyword>1@name: Electric
- keyword>2@name: super Chargers
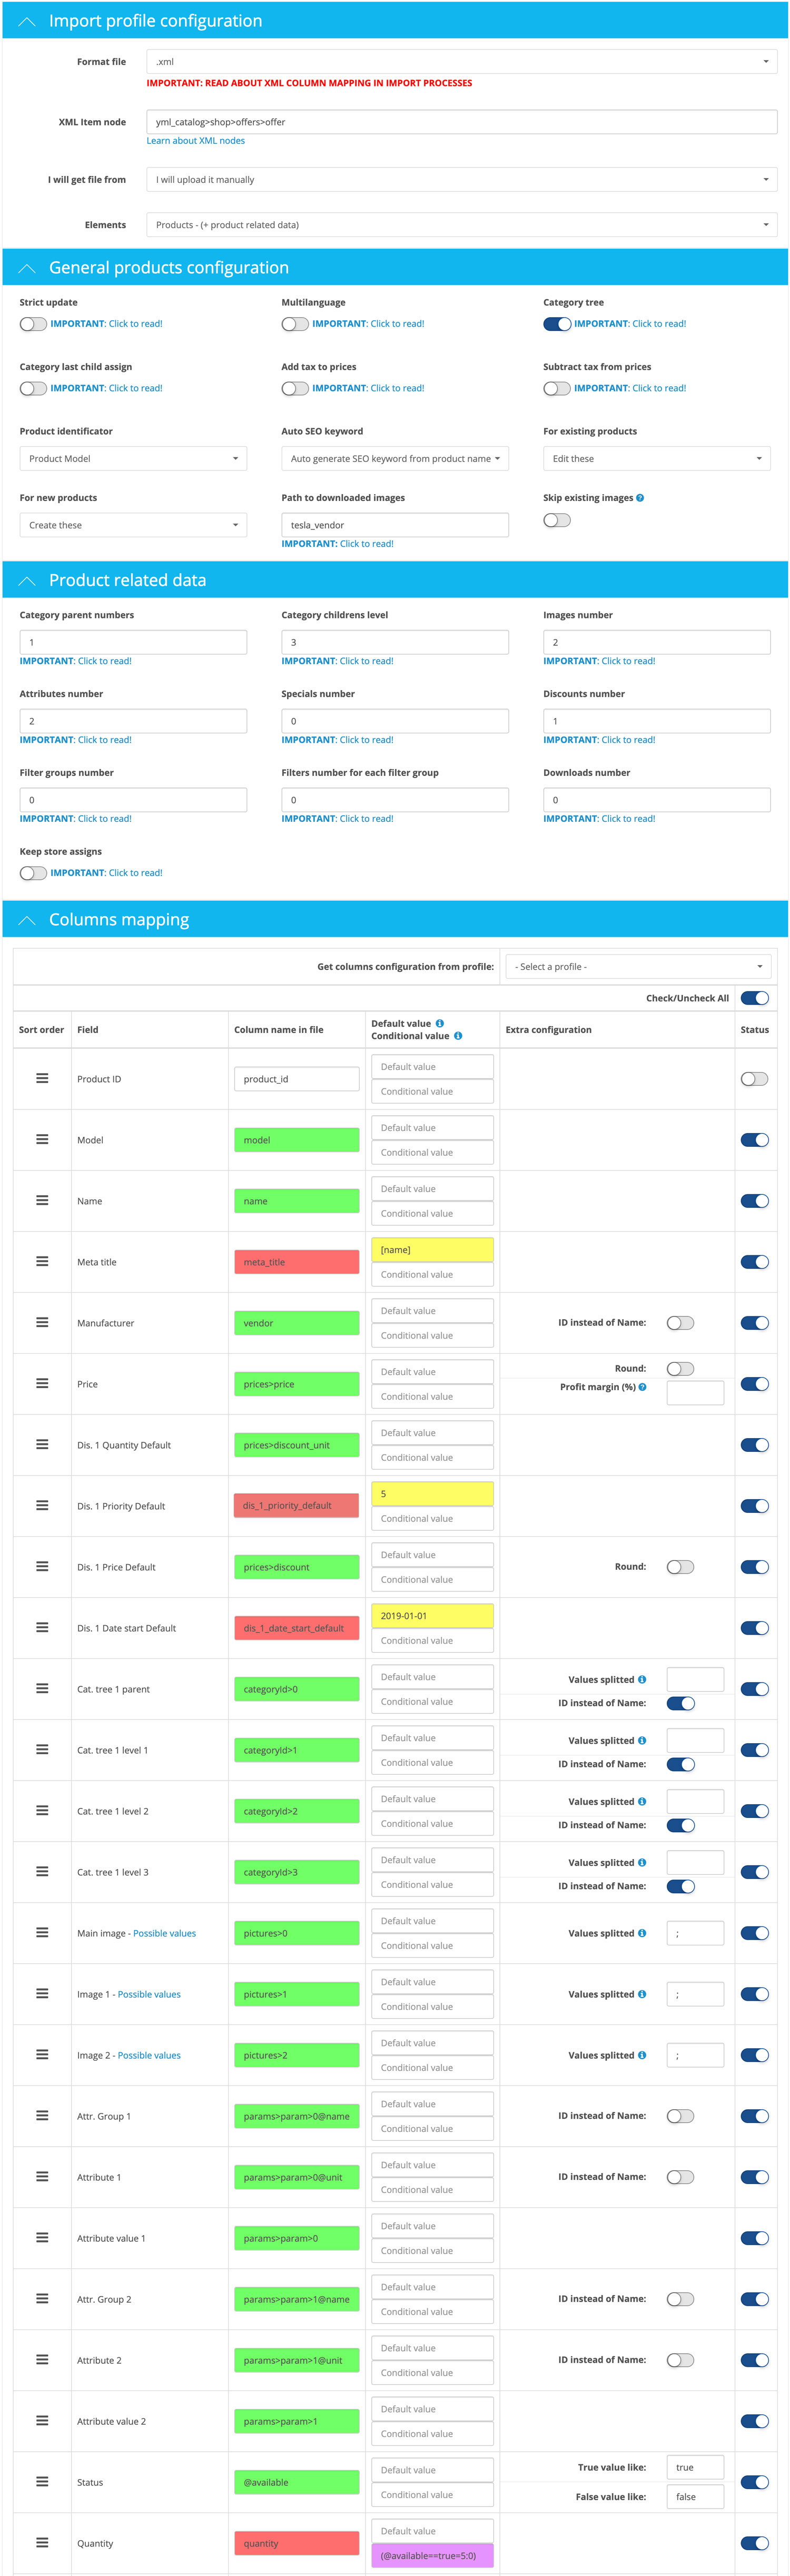
Step 2 - Configure the column mapping
We have colored the text fields to be able to explain it better:
- Green text boxes: Are the column names that we can find in our XML file.
- Red text boxes: This columns are not in our file, but we enable them to be part of the importantion through the default values or conditional values.
- Yellows text boxes: Default values.
- Lilacs text boxes: Conditional values.
Information about red fields
The red columns doesn't exist in our XML file, even so we have enabled them and we have established a series of default values and conditional values for this tutorial, we explain them below:
- Meta title (meta_title): We want that this column acquire the value of the "Name" column (name), so we have set a default value (Yellow color) the name of the column "Name" un square brackets [name].
- Dis. 1 Priority Default (dis_1_priority_default): We want that the default value of this column to be "5", so we have put it in the default value (Yellow color).
- Dis. 1 Date start Default (dis_1_date_start_default): We want that the default value of this column to be "2019-01-01", so we have put it in the default value (yellow color).
- Quantity (quantity): We want that the value of this column to be "5" when the "Status" (@available) column value be "true", otherwise, it will acquire the "0" value. Is about a conditional value (Lilac text box) here is the condition: (@available==true=5:0)