Advanced lesson
Know in detail the possibilities offered by correctly configuring GTM feeds
Whether we are creating or editing a feed, the same configuration zones will always appear, highlighting that, depending on the type of feed, certain exclusive configuration of that type of feed may appear.
Once we select a feed to edit it or press the button to "create a new feed", there will be some configuration areas that we will explain below, click on each of the headlines to display the content.
1.- File configuration

From this area we will define the configuration of our feed, choose the option that best suits your situation in the "The feed file will be..." selector. This dropdown will produce the following possibilities:
- Downloaded from my web browser: This option is ideal for stores that can load the feed without problems through a URL which you will have available once the configuration of the feed is saved. That same URL will be sent to an external market which will then be feed to the information of your store fully updated.
- Save to my server: If your store has a high volume of products or a high level of web traffic, this option may be advisable in your case.
When we launch this generation of feed, this process will generate a physical file and save it on your server, this is compatible with CRON Jobs so when launched it can be scheduled on your server to run when the web traffic is commonly low (at night). - Saved into external server: Similar to point two however the feed will be saved on an external server.
IMPORTANT: Both option two and option three must be executed through a CRON Job, since the information in the feed file will only be updated when the command to generate and replace the feed file is executed. Another option would be to execute it manually, but we understand that this is not viable in any case.
2.- Feed type

From this selector we can select the type of feed we need, by "type" we mean the market that will feed from that feed: Google Merchant center, Google reviews, Facebook catalog ...
Once the type of feed has been chosen, the other configuration areas will appear and be selectable.
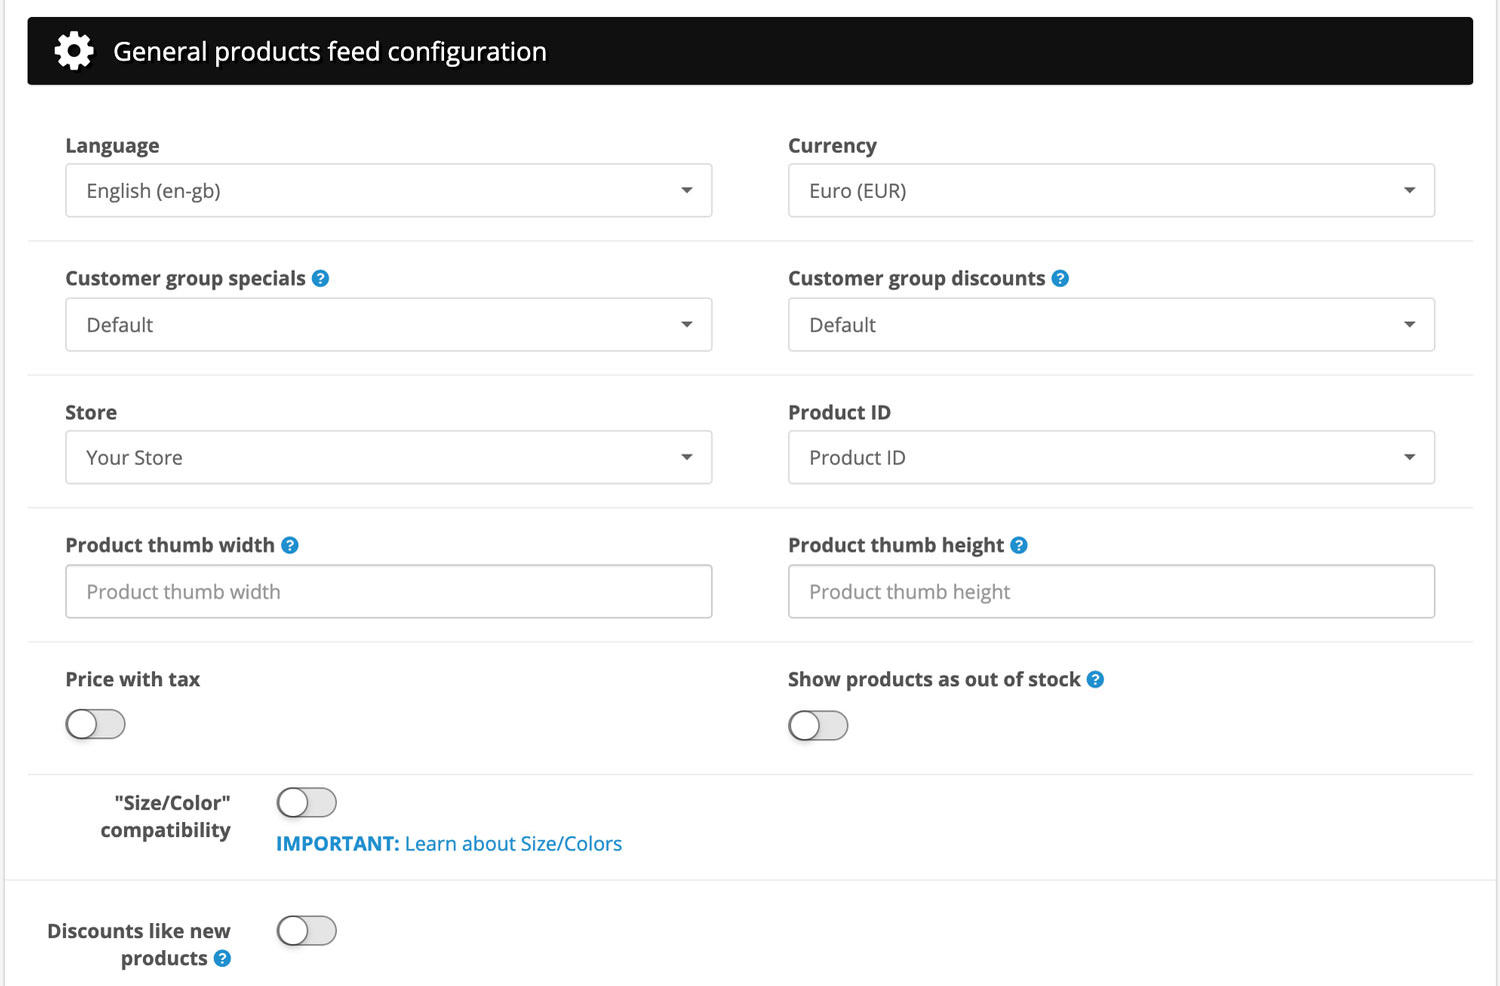
3.- General configuration of products feed

From this section we can define the following parameters for the products that will appear in the feed:
- Language: The language of our products (name, description, etc ...)
- Currency: The prices will be formatted to the currency we select in this section.
- Customer group offers: This will take into account only the offers of the selected customer group.
- Customer group discounts: This will take into account only the discounts of the selected customer group.
- Store: The feed will only show the products of the store that we choose.
- Product ID: This feed will pull by "product ID" the field that we choose here.
- Product thumbnail width: This feed will generate the thumbnails of images of the products with the width that we establish in this field.
- Product thumbnail height: This feed will generate the thumbnails of images of the products with the height that we establish in this field.
- Price with tax: If activated, prices will be shown with taxes applied.
- Show products as out of stock: If this is activated it will also show the products as "out of stock." (Quantity less than or equal to 0)
- "Size/Color" compatibility: If activated, the system will "divide" your products by the different combinations of "Color-Size" that may occur, to know more information, click on the link "IMPORTANT: Learn about Size / Colors" and a popup will appear with more detailed information.
- Discounts like new products: If activated, the system will "divide" your products by each discount you have, changing the name to "Product name - X" where X in the unit to which the discount is applied, and also the price of that product.
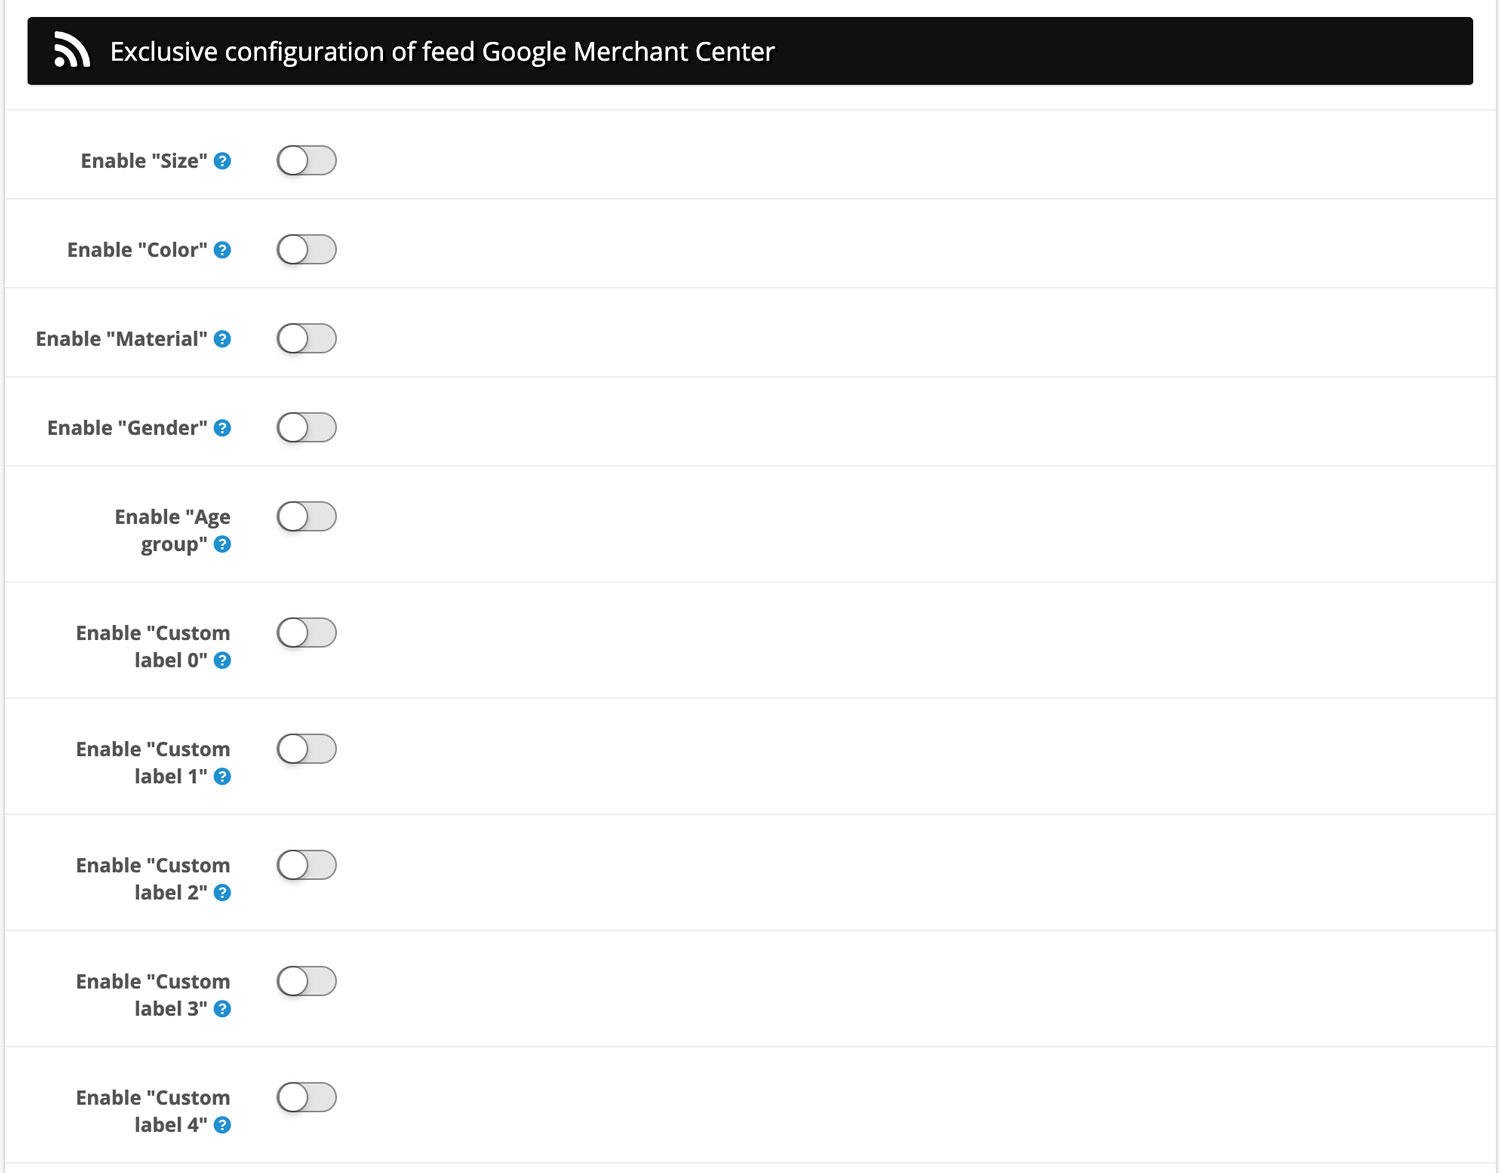
4.- * Exclusive configuration of feed Google Merchant center

This configuration area will only appear if our feed is of the "Merchant center" type.
In this section we can define the following configuration:
- Enable "Size": This option refers to the merchant center tag "<size>". If we enable it, we can define where that data will be extracted from (Attributes, Filters or Options), as well as establish a default value for products that do not have data assigned.
- Enable "Color": This option refers to the merchant center tag "<color>". Same explanation as point one.
- Enable "Material": This option refers to the merchant center tag "<material>". Same explanation as point one.
- Enable "Gender": This option refers to the merchant center tag "<gender>". Same explanation as point one.
- Enable "Age group": This option refers to the merchant center tag "<age_group>". Same explanation as point one.
- Enable "Custom label X": Where "X" is the label number, 0,1,2,3 and 4. Same explanation as point one.
5.- Quick product filters

From this section we can select the categories or manufacturers whose products will appear in the feed, simply select the categories and manufacturers from these two selectors. In upcoming release updates we will be adding more "quick filters".
Note: If we want to show all the products of all categories, we leave the "Categories" selector blank, in the same way with the manufacturers.
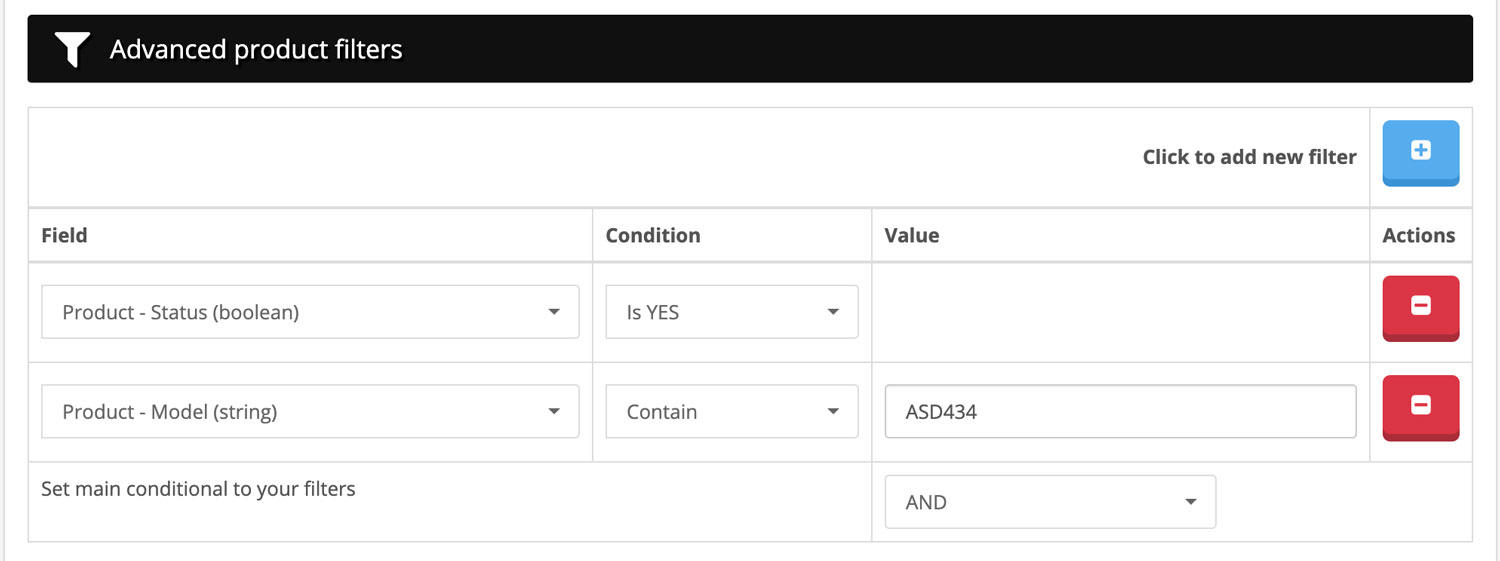
6.- Advanced product filters

From this section we can create advanced filters to show only the products that meet the conditions established in this section, to add a new filter we will press the blue "+" button, to eliminate it, we will press the red "-" button.
We see in the lower part of the table the main condition "Set main conditional to your filters", where we can choose the values:
- AND: For a product to be shown in the feed, it must comply with ALL the conditions that we established above.
- OR: For a product to be shown in the feed, it must meet AT least ONE of the conditions we established above.
In our example, we have established the following filter: "All the active products (" Status = 1 ") will be shown in the feed and whose model will contain" ASD434 "examples:" 234ASD4344554 "," ASD4343343 "," Asd434 ".. .
Note: If no filter is set, all the products in your store will be displayed. (Although other conditions have also been established elsewhere).
7.- Save feed

From this area, we can set the name of our feed and save it by pressing the blue "Save feed" button. Once saved, the page will be refreshed and we can see our feed in the list of created feeds.
Note: If we are editing a feed, a red "Delete feed" button will also appear in this area, which will allow us to delete this feed.
